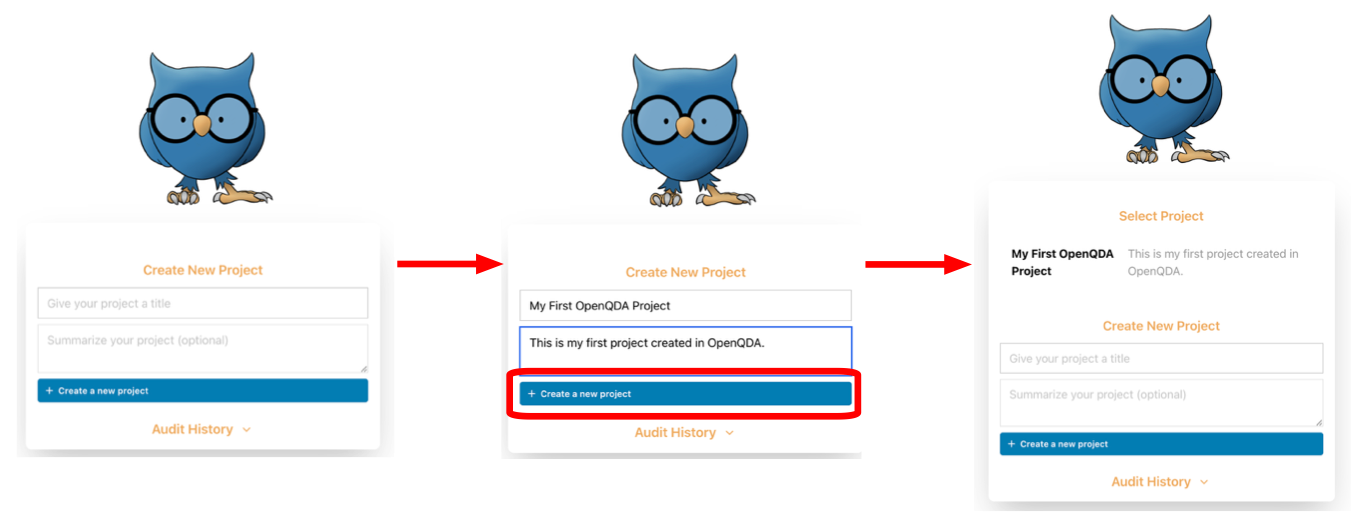
Create your first project
Your work in OpenQDA is organized in projects.
Fill out the project form and give your first project a nice name (and optionally write a description, for example your research question). Then click the Create a new project button. Your new project is created, and you go to the project tab. If you want to go back and create more projects or switch between projects, click on Qudi, the little blue owl, in the left corner (this will change in the next version of OpenQDA, because it is not self-evident).

Manage your project
OpenQDA is organized in four different tabs oriented on the workflow of a typical QDA project. Those tabs are "Project", "Preparation", "Coding" and "Analysis", and you find them at the top of your screen. When you create a new project, you will find yourself at first in the "Project" tab of OpenQDA. Here, in the Overview you can update the project name or project description of your project and even delete your project.
In the sub tab Collaboration you can set up your project to work with others. We skip this part for now.
In the sub tab Codebook you can manage different codebooks, share, reuse and import codebooks from other people. To create an empty codebook for your project, simply enter a name and optionally a description and click the blue "Create" button.
❗ Please note: OpenQDA gives you the option to share your codebooks with other users of the platform. To do so, click the little checkbox next to "Shared with public" when creating your codebook. It will then appear in the Public Codebooks section and others can import a copy of it into their projects. This will not have any effect on the codebook in your project.
In the sub tab History you see a full log of all actions within the project.
💡 Tip: BTW, if you want to edit your profile picture, click on the profile picture in the upper right corner of the screen (at the moment it should just be your initials) and select "Profile". Now you can select a new photo for your profile by uploading it from your hard drive. You can also change your name or password..